Quick-Start
This chapter guides you through the most important features of Barcode Studio by walking through how to create an EAN-13 barcode. For detailed reference information, see the chapters from Generate Codes – Export and Print through Options.
Creating an EAN-13 Barcode
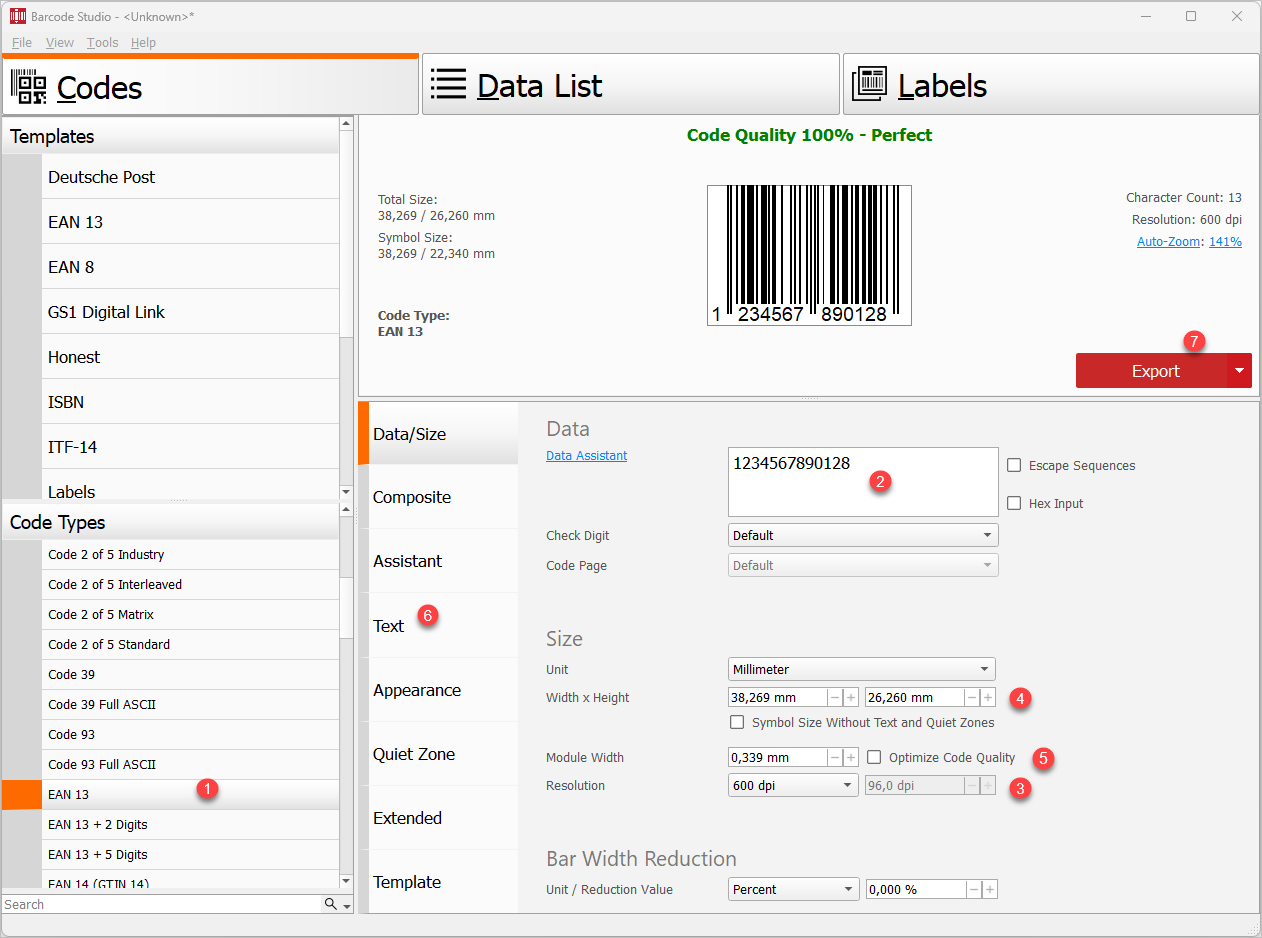
The numbered markers in the screenshot correspond to the following steps:
Step 1 – Select the Code Type (Symbology)
Open the Code Type list and select EAN-13. The list is grouped by category (Linear Barcodes, 2D Codes, Postal Codes, GS1 Codes, ...).
Use the search box below the list to filter by name or by allowed content.
Type EAN to narrow the list immediately.
Step 2 – Enter the Code Data
EAN-13 requires exactly 12 data digits. The 13th digit (the check digit) is calculated automatically. Enter 12 or 13 digits in the Data field.
- The default data is
123456789012. - If you enter 13 digits, the last one must match the calculated check digit.
- An invalid entry (wrong length or wrong check digit) shows an error in the Code Status area and prevents code generation.
For a list of common error messages, see Appendix B: Error Messages.
Step 3 – Select the Output Resolution
Choose the resolution in the Size section of Page Data/Size. For this walkthrough, select 600 dpi.
Choose a different setting when required:
- For screen or web output, select Screen Resolution and export the image at its final pixel dimensions.
- For printing, select Printer Resolution or the printer's native resolution. Common values are 300, 600, or 1200 dpi.
- For prepress workflows, use the exact resolution specified by the target system.
Always generate codes at the exact resolution and size required by the output device. Do not scale or resize raster barcode images after export – this distorts module widths and can make codes unreadable.
Step 4 – Specify the Code Dimensions
Set Width, Height, and Module Width in the Size section.
Most label and code specifications require specific code dimensions. Common EAN-13 dimensions at standard magnification factors (100% = SC2):
| Magnification | Module width | Width | Height |
|---|---|---|---|
| 0.80 (SC0) | 0.264 mm | 29.83 mm | 20.73 mm |
| 1.00 (SC2) | 0.330 mm | 37.29 mm | 25.91 mm |
| 1.50 (SC6) | 0.495 mm | 55.94 mm | 38.87 mm |
| 2.00 (SC9) | 0.660 mm | 74.58 mm | 51.82 mm |
For this walkthrough, use 1.00 (SC2): a module width of 0.330 mm and dimensions of 37.29 x 25.91 mm.
Step 5 – Fine-tune the Module Width
The Code Status bar at the top of the preview shows the current quality (0--100%). Aim for Perfect (100%).
Code Quality indicates how accurately Barcode Studio can render the barcode at the selected resolution and module width. Higher values indicate that the modules fit the selected pixel grid more accurately.
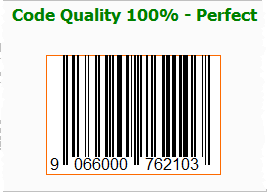
For this walkthrough, enable Optimize Code Quality. This automatically snaps the module width to the nearest integer pixel size and eliminates aliasing artifacts.
Alternatively, use either of these methods:
- Set the unit to Pixel and enter a whole-number module width (e.g. 3, 5, 10).
- Increase the output resolution.
See Optimize Code Quality for details.
Step 6 – Set Font Style and Size
For this walkthrough, keep the default font settings unless your application requires a specific font. To change them, open the Page Text settings and click the Font button. Adjust typeface, size, and style for the human-readable text.
Step 7 – Export or Print
Click the Export button in the code preview to open the export dropdown:
- Export Code... – save as an image file (BMP, JPG, PNG, EPS, PDF, ...).
- Copy to Clipboard (As Image) – paste into Word, PowerPoint, or any application.
- Copy to Clipboard (As Metafile) – paste as a scalable EMF (Windows only).
- Print Code... – print with size and quality information.
For a first file export, select Export Code... and save the code as a PNG file.
For batch export and label printing, see Export a Series of Codes and Print Labels.
Using Code Templates
Barcode Studio's predefined templates provide settings for common barcode specifications. They store symbology, dimensions, and quality settings so you do not need to reconfigure them each time, and they can help save time during optional barcode certification.
- Select a template from the Templates list, e.g.
EAN 13 / SC2 (100%)... - Enter the code data (see Step 2).
- Adjust any remaining settings if needed.
- Export or print (see Step 7).
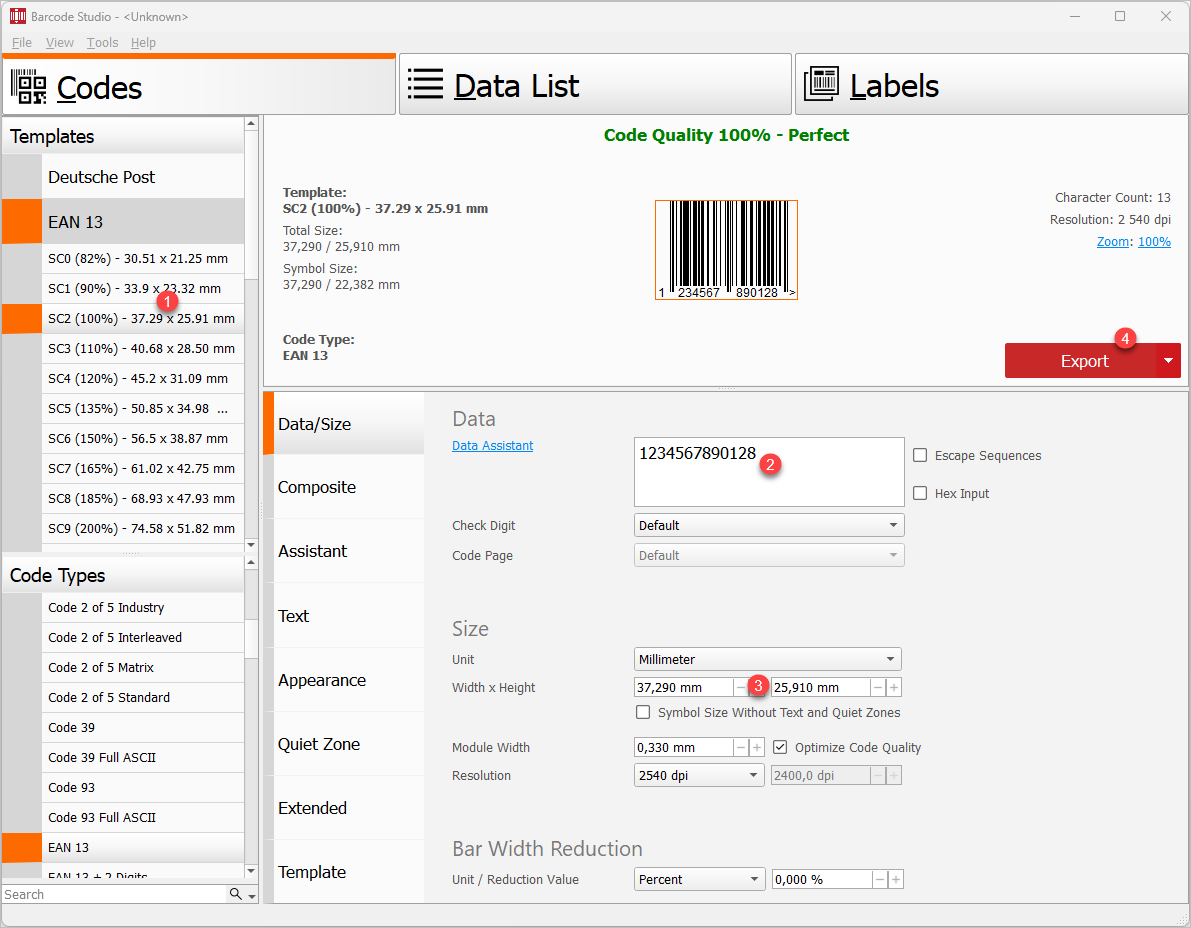
The numbered markers in the screenshot correspond to the four steps above.
Save your own configuration as a template with File > Save As Template... so you can reuse it across sessions.